7 Tips – How To Clean And Maintain A Sewing Machine

Whether you are a Beginner, Intermediate, or Advanced, having the Sewing Machine working well will enable you to complete various types of projects. However, most sewers are unsure how to maintain and clean their machines to increase their life of the Sewing Machine.
For a home sewing machine to last long term, it needs to be well maintained. This includes regular cleaning to ensure the machine’s longevity. Maintainance and properly Lubricating the Sewing Machine are some essential things. Here we’ll show you How To Clean And Maintain A Sewing Machine properly to avoid unnecessary repairs in the future.
Why It Is Important To Clean And Maintain The Sewing Machine?
Sewing Machines can be one of the most valuable assets for a Sewesit. A sewing machine must be clean and maintained. A dirty machine makes for uneven threading and sewing, resulting in shobby stitching. When a machine is in good working condition, it can take a higher level of strain.
There are numerous reasons why it makes sense to clean and maintain a sewing machine regularly, and some of the benefits of doing so include:
- Improves performance, quality, and durability
- Provides a safer and more enjoyable experience to sew
- Protects your investment
- Eliminates potential maintenance issues down the road
Tools Needed To Clean And Maintain Sewing Machine
Sewing Machines make clothing, repairs, and projects requiring precise detail and high-quality craft. But in the real world, they can cause problems, and to avoid certain issues, they need constant care and Maintenance. Following is the list of tools used to clean the Sewing Machine.
- A Pipe Cleaner (Chenille Stem)
- A Lint Brush
- Cotton Or Microfiber Cloth (Soft)
- Sewing Machine Oil
- Rubbing Alcohol
- Screw Driver (in case you have to open any part of the sewing machine)
You can also check about Sewing Machine Cleaning Kit.
How To Clean A Sewing Machine
Sewing machines notoriously become dirty after some use, so it’s surprising how often the parts need cleaning. After all, keeping your machine well maintained won’t have to spend money on a new machine every few years. Let’s read the article to understand the cleaning process.
Unplug The Sewing Machine
Before starting the cleaning, make sure to Unplug The Sewing Machine to avoid any problems. Please put it in a lighted area so you can have a clear view of the condition of the Sewing Machine.
Check The Manual
You can check the Manual about the areas which need cleaning. Before starting the cleaning process. One important thing to do is to remove Needle and Bobbin from Bobbin Area.
Brushing The Machine
Now check where you can locate the machine’s dust, debris, or lint. Brush out all the stuff using Lint Brush. You can also use Tweezers to pull unwanted threads or debris.
Cleaning The Feed Dogs And Bobbin Area
This is an important task to do while cleaning the Sewing Machine. Because most of the lint, debris, or dust can be found under the Feed Dogs or Bobbin Area, to clean this. First, you have to unscrew the screw to remove the Feed Dog.

Gently clean the Feed Dogs using the brush. And for Bobbin Area, you can also use the Lint Brush and Tweezer to remove unwanted threads, dust, etc.
After finishing the cleaning process of this area, you can screw again to fix the parts which you removed.
Cleaning The Machine From Outside
Use a soft cloth to clean the machine from the outside. To clean the outer areas of the Sewing Machine, you can use a slightly damp fabric.
Oiling The Sewing Machine

Oiling is one of the important steps to do to maintain the Sewing Machine. Check the Manual for confirmation where Oiling is needed. Use a fabric to clean the surrounding area after Lubricating The Sewing Machine.
Ready Test
Install the Sewing Machine Needle and properly thread it. Wind the Bobbin and adjust it back to the Bobbin Area. Take a Fabric and use simple stitches to check whether the machine is working properly. In the first few stitches, there is a chance to see some debris or lint coming out of the machine, but after a while, there will not be any debris or lint.
Some Important Notes To Remember
- Please don’t use cheap brushes as they can leave their bristles in the parts of the Sewing Machine, which can cause damage sometimes.
- Some brands advise not to clean the Sewing Machine by yourself. It will disable your Warranty. So be sure to read about it before the cleaning procedure.
- If you are using a vacuum to clean the machine. Be sure there is no loose screw or anything which can go into the vacuum. And be careful while vacuuming to avoid any damage or probleDon’tn’t blow the Sewing Machine to remove any lint. It can cause a problem with your electrics like moisture and rust.
- You can lessen the lint building in the interior of the sewing machine by using good-quality threads.
- Be sure if oiling is not compulsory, as New Sewing Machines do not allow you to oil theDon’tn’t use oil that is not recommended to use for lubricating a Sewing Machine. as it can cause damage to the machine.
How To Maintain A Sewing Machine
Maintaining maintenance can be a huge hassle — especially if you don’t know where to start. Maintaining your sewing machine can be a snap with just a couple of tools, a little grease, and some time.
Checking The Cord And The Foot Pedal
First of all, check if the Extension Cord is ok or if there is any damage. If it is damaged, it must be replaced as soon as possible to avoid shock or damage.
Almost All Sewing Machines come with the Foot Pedal, which is also a compulsory Part of the Sewing Machine to keep sewing with it. Sometimes Foot Pedal may be broken or damaged, which is not safe to work with. You can replace the Foot Pedal to avoid trouble.
Always Keep Sewing Machine Covered
Almost all New Sewing Machines come with a Dust Cover. And if you have a sewing machine with no dust cover, cover it with a clean fabric; otherwise, cover the Sewing Machine with the Dust Cover to avoid contact with dust or sunlight.
Service Annually
Annual Service from a Professional is recommended for the long life of the Sewing Machine. A professional Service Provider will thoroughly check and clean the Sewing Machine. Annual Service boosts the sewing Machine’se’s performance and increases the SewiMachine’se’s working lifespan.
Changing Of Sewing Machine Needles
Needles become dull or maybe bent after using a specific period, which can cause Skipped Stitches, Thread Breaking, and even Bobbin Jamming. So to avoid this problem, you must check your Needles to see if they need changing.
Recommendations are to change the needle after at least 8 to 10 hours of working. Read about Sewing Machine Needles Here.
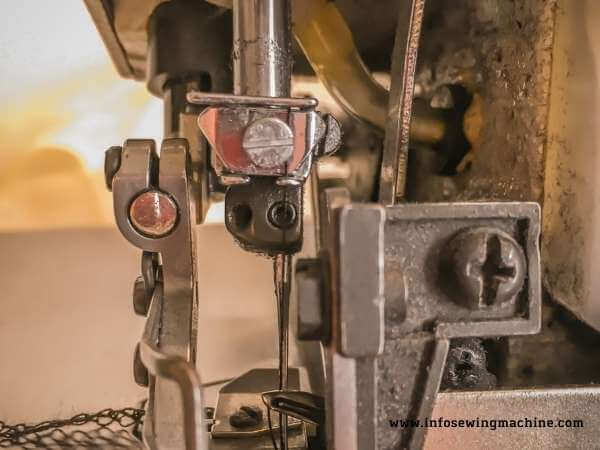
Lubricating The Sewing Machine
No one can deny the importance of Lubrications for the lifespan of the Sewing Machine. Parts of Sewing Machines need proper Lubrication after a specific period to work smoothly.
After a few hours of stitching, the sewing machine parts become hard and sometimes make a little noise while sewing. Friction between its parts getting visible. So avoid all this when you oil the sewing machine parts, the friction becomes less, and because of lubrication Sewing Machine runs smoothly, and noise can be gone.
After applying the oil, clean the area to avoid strains of oil getting into your fabric. Some machines do not need Lubrication, so check the manual.
Important Areas Need Attention
Handwheel Bearing, Needle Bar, Presser Foot, Clutch Assembly, Bobbin Area, Hook, etc., are all important areas that need attention and cleaning.
Cleaning Only One Part At A Time
Don’tn’t over mess up while handling the machine. Only give attention to a single part at a time. Sometimes when you open the different parts of the sewing machine at once. There could be chances of confusion between different parts and screws etc.
Clean and assemble only one part at a time, and then you can move forward to another part.
Remove Lint, Debris, And Dust
After finishing or before starting a new project, whatever suits you, it is very important to give a thorough cleaning to the Sewing Machine.
Use a Lint brush, Tweezer, or Compressed air to remove all the lint, debris, or dust from the sewing machine parts. When using Compressed Air, keep it at least 4 inches from the Sewing Machine.
Especially clean the Feed Dog, Tension Disc, and Bobbin Area.
Maintaining The Face Plate Area
There are two screws to open the Face Plate Area. First of all, open the Face Plate Area by unscrewing the screw. It will offer you to clean the Needle Area and Presser Foot bar easily. Clean these areas thoroughly.
New Machines come with the Mounted Face Plate, which needs not be removed. It can easily be moved to clean the area. If the area is gummy greasy, use a fabric wet with a little solvent to clean it. After cleaning these areas, properly lubricate them.
Cleaning The Handwheel Area
First, remove the screws to unattach the Clutch and Handwheel. Unscrew the Locknut to remove Washer and Handwheel. (some machines are slightly different from each other)
If the machines have an internal belt, then the handwheel can not be removed, and if it is an external belt, then remove the belt and the handwheel.
Clean the Washer, Shaft, and Handwheel. Lubricate each part and reassemble the Clutch and Handwheel again.
Check the smoothness of the sewing machine by running it with your hands.
How To Maintain A Sewing Machine?
Maintaining a Sewing Machine is not difficult if you do it properly and at different intervals. Below we are going to write about some adjustments to the parts of the Sewing Machine.
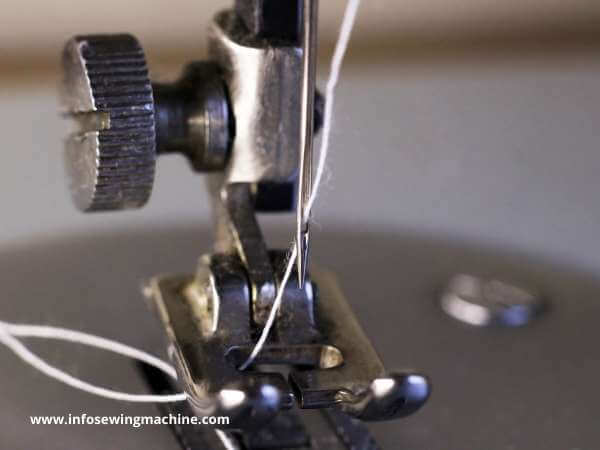
Sewing Machine Needle
Proper Needle Installment is very important to avoid many problems related to Sewing Machine. Insert the needle into the Needle Bar Clamp with the groove of the Sewing Machine Needle facing the side front. Adjust it until it hits the upper side of the clump and tighten the screw.
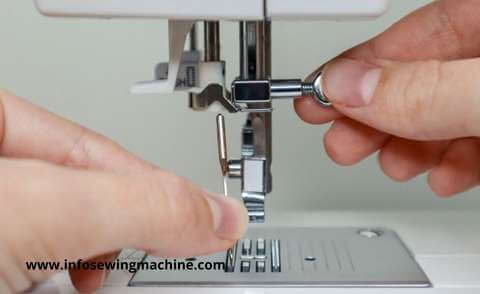
Presser Foot
Presser Foot is used to hold the fabric between Dog Feed and Needle. Properly adjust the Presser Foot to and adjust the pressure of the Presser Foot. Presser should be adjusted by increasing or decreasing the inner pin or screw attached.
New Sewing Machines have automatic Presser Foot Attachment, which makes it possible to attach the presser foot with only a single click.
Throat Plate
Use the proper needle plate to avoid Skipped Stitches when using a Synthetic Fabric. Check the Throat Plate for Rough surface and remove it. Some Sewing Machine Manufacturers recommend using a needle plate with a round hole for Straight Stitching, and for Zig Zag Stitching, use the Elongated Hole.
Thread Tension
Improper Thread Tension causes many problems like Needle Breaking, Thread Breaking, Bobbin Jamming, Skipped Stitches, etc.
There are two tensions every machine deals with. Upper Tension & Lower Tension
Upper Tension: Upper Tension has a different mechanism in different Sewing Machines. You can find it in different places like, On the Face Plate, Face Of Needle Bar Housing, Front Of The Needle Bar Housing, Upper Arm Of The Machine Head.
Suppose bobbin threading loops are showing on the Top of the seam along with straight seam thread. It indicates Too Tight Tension.
Lower Tension: Almost all Sewing Machines come with the same mechanism of Lower Tension, which can be located on the Bobbin Case or the Shuttle. It can be adjusted by just tightening or loosening the screw.
If the thread coming from the spool goes under the seam, but the lower thread is straight. It indicates Too Loose Tension.
First, adjust the Upper Tension. But if lower tension is not set, set both Upper and Lower tension to avoid dragging the thread. You can check it using different colored threads so it will be easy for you to understand which tension is improper.
For perfect tension, you will notice the smooth stitching without any loops on the Top or bottom of the seam.
Feed Dog
The Feed Dog offers a fabric to move smoothly while Sewing. Suppose the Fabric Is Not Moving Smoothly While Sewing. It indicates the first and most possible reason for damaged Feed dogs or Teeth of Feed dogs in lower positions etc.
The teeth of Feed Dog are shown under the Needle plate, but they should be seen above the needle plate to hold the fabric.
The teeth on the feed dog should project above the needle plate so that the bottom of the teeth, or serrations, are level with the Top of the needle plate when the dog moves the material before the needle makes the next stitch.
Conclusion | How To Clean And Maintain A Sewing Machine
The only way to Maintain a Sewing Machine is to take care of it by cleaning and servicing it properly. Take care of your sewing machine, which will last a long time. Suggestions are to check the Needle and Bobbin and oil the machine. If the needle is clogged or broken, replace it. If the bobbin thread is badly damaged, throw it away and use a new one. Remove any debris, lint or dust, etc.
FAQs | How To Clean And Maintain A Sewing Machine
How do I know if my machine needs to be serviced?
If the Sewing Machine is creating any problem repeatedly while Sewing, then the machine needs to be serviced.
How do I maintain a sewing machine?
You should oil the machine’s parts regularly. Remove any dust, debris, or lint from its parts. Always cover the Sewing Machine when not in use.
What are the materials needed to clean the sewing machine properly?
Tools or materials which are needed to clean the sewing machine are: Lint Brush, Screw Driver, Tweezers, Cotton or Soft Fabric, Rubbing Alcohol, Machine Oil.
What is a presser foot?
The Presser Foot is a tool that holds the fabric in place as you sew.