How To Remove Embroidery Without A Seam Ripper – 7 ways

Embroidery is beautiful. It makes the process of creating clothing look so easy. But it can be challenging when it comes to remove it without damaging the fabric.
Many people have embroidery projects with faults that they want to remove from garments but don’t want to destroy the garment. We know that a Seam Ripper can fix any problem that comes from bad stitching. Suppose you want to go beyond what a regular seam ripper can do. Then this is a real problem for those who don’t have a seam ripper, but they must want to remove that spoiled embroidery. They don’t know How To Remove Embroidery Without A Seam Ripper?
Embroidery removal can be quite difficult for someone unfamiliar with the techniques, tools, and knowledge required to remove the stitches. However, there is some alternative to a seam ripper. You can also use the method outlined here for embroidery removal by hand.
Can You Remove Embroidery?
Embroidery can be removed, No doubt. There are two options for embroidery removals first if you want some adjustment, and second, if you have to correct a mistake.
When people remove embroidery from their clothing or bags, incorrect stitches are most common. It’s easy to spot these kinds of errors, so people usually correct them as soon as they find them. They repair it by removing the embroidery and stitching it back in again. With the right tools and enough practice, anything is possible in embroidery.
You must be patient while removing embroidery, like Fonts, Designs, and Motifs are time-consuming. But sometimes, embroidery blanks can not be removed. For example, if you use Velvet, Vinyl, Cardstock, or Leather fabric, retain permanent holes after embroidery removal.
Best Tool To Remove Embroidery
A Seam Ripper is used to remove embroidery and seams from fabrics. Seam rippers are tools sewers use to pull the threads apart of sewists’ seams during the sewing process.
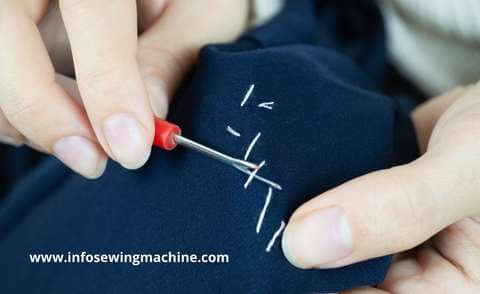
They’re useful for pulling up the threads if you need to cut back the fabric before finishing the project. It is the easiest way to remove unwanted seams, embroidery, or threads from the fabric.
Seam Ripper Alternatives – If You Don’t Have A Seam Ripper?
From time to time, you need to remove unwanted stitches or seams. Sometimes you may find stitches should be removed when they become an impediment to getting an embroidery project done or completed. With a few simple stitches, you can turn any design from ugly to gorgeous in no time. You may have a particular stitch or color that isn’t working for your project.
A seam ripper may work well for some of these stitches, but there are Seam Ripper Alternatives to remove embroidery if you don’t have a seam ripper. The embroidery inside a garment or the jacket pocket can be removed for a neat look if you don’t use a seam ripper. There are various techniques for removing stitches which is why the following guide will explain different methods of removing embroidery without a seam ripper. Each has its advantages and disadvantages.
01. Using A Straight Pin
A big time commitment is involved, but it’s well worth it. If you want to unthread straight or simple embroidery stitches, clip one of the last stitches, then pull it up one or two stitches at a time with a straight pin. This method works for so many other needlecrafts, as well. It’s also a fun way to use up leftover floss or thread.
If your embroidery floss is relatively thick, you can use a larger pin instead of a regular pins. Pins can also be a good way to identify mistakes in stitching or flaws in the work that was made by the machine. The pin must be very carefully positioned to avoid hurting your fabric.
02. Using A Blade
You’ll have to be extremely careful when using a razor blade because even the smallest nick can damage the fabric. To remove solid embroidery stitches, you can use a razor blade, sharp pocket knife, etc. Try to cut with the blade while putting it away from the fabric. Just make little cuts on the embroidery threads to open them up. After that, you can pull threads out from the fabric.
03. Using A Snipper
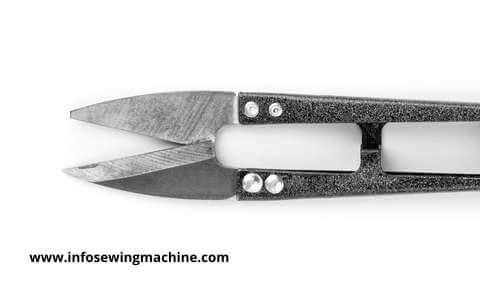
Sewing snippers are also useful, although they are not as commonly used as regular scissors. You might have to cut stitches on both the front and back of the embroidery design. During this removal, a Tweezer might help pull the ripped-apart stitches out of your fabric for a clean look.
04. Using A Fabric Blade
These Fabric Blades are very helpful if you want to remove strong embroidery stitches, tough stitches, or serger seams. Consider this as a last option as it can damage the fabric. Especially avoid using it if you are working on a soft fabric like silk or cotton.
05. Using A ToothPick
Suppose you find nothing around you to remove the embroidery stitches. You can use a toothpick as an extra option. Using a toothpick when dealing with a soft fabric will be good, as it can help remove the loose thread of a seam without damaging the fabric.
06. Using A Needle
Using a Needle to remove embroidery is not only an easy and convenient way, but also it does not damage your fabric. You can use your needle to remove the stitches gently. It minimizes damage to your fabric and the chance that any other sitch will get ripped out. Also, you can undo the knotted and tangled stitches using a needle.
07. Using A Pair Of Scissors
Scissors are good helpers for the sewing and cutting process. You can use a pair of scissors to cut through the middle of the seam and embroidery. It would even be better if you had a sharp pointy pair of Embroidery Scissors with you.
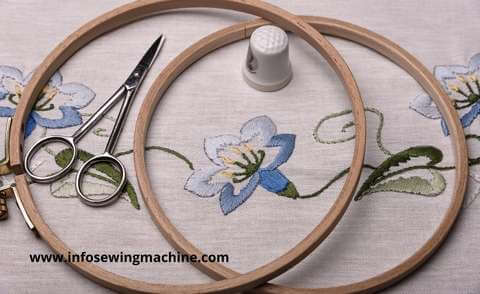
It’s difficult to rip the seam open at one end and then progressively cut the stitches pulling the two sides apart. Be careful on applying force and size of scissors you use depend on the type of seam, fabric, and thread you are working with.
How To Remove A Logo Embroidery, Patch, Or Scout Patch
Although a lot of fun and sometimes time-consuming, machine embroidery is sometimes done by Emboroidery Sewing Machines designed to use a heavier thread, and they are more complex than hand-done embroidery. It takes more time to remove logo embroidery, scout patches or simple patches, etc.
These machines are sometimes built to use a heavier thread and programmed to repeat a design hundred times with precision.
The methods given above in the article may be enough to remove many store-bought Decorative Stitches, but if they’re not strong enough or the stitches are tight, they might be hard to remove. Although it is very rare, the stitches sometimes come out independently.
01. Using A Hair Trimmer
I swear it works incredibly if used carefully on a thick embroidery patch. Avoid bringing it very close to the fabric. Just try to touch only embroided area which you want to remove. For a better result, keep the fabric as flat as possible.
02. Using A Stitch Eraser or Embroidery Eraser
There is a very small difference between a Stitch Eraser and trimmers. But the main difference is the device’s function, as the stitch eraser is specially designed for embroidery removing function. It is perfect for removing logos or Professional Embroidery patches.
If you find that removing embroidery stitches is becoming a regular habit, it may be time to invest in a device made just for the task. Stitch erasers are helpful but can be expensive, so you might want to consider a device that comes at a lower price.
But it’s an invaluable investment if you frequently need to remove embroidered designs or if you run a business that deals with embroidery.
How To Remove Embroidery Using An Embroidery Eraser
- Turn the garment inside out for a visible embroidery
- Cut the embroidery threads with the eraser slowly without damaging the fabric
- Turn the fabric the right way out to remove the stitches, with the help of tweezers to tear the stitches.
- Now turn backside and use the embroidery eraser again. Repeat the process if you have not done with the embroidery removing process.
- Use a Lint Roller to remove threads or debris from the fabric.
How To Remove Embroidery Using Embroidery Scissors?
Embroidery Scissors, as the name, describes specially designed to use for embroidery purposes. These scissors have sharp, very fine tips. While using regular scissors can increase the chance of cutting something you don’t want to.
You snip the threads by sliding the tip under the embroidery stitch. And then cut the stitches after cutting the threads from the upside and downside. You can now pull the threads away from the fabric to remove unwanted embroidery. During the process, you can alter the fabric from front to back and back to front.
01. Preparation Of Fabric
There is an art to picking a stitch that is the most appropriate for the garment type and style. This will protect the fabric on the outer portion of your shirt should you miss a thread or dig into the fabric while trying to pull the thread. Be sure to identify where the seam stitch starts instead of the end.
You’ll have a better chance of undoing the seams from the beginning, and you may use a pair of scissors or a razor for the tighter and more challenging seam end.
02. Removing The Unwanted Stitches
It’s much easier to pick out each stitch when you work a few rows at a time. If you have trouble picking out the stitches, try skipping one row.
You’ll get much more benefits from your straight pins if you hold them parallel to the grain and not through the inside of the seam. Otherwise, you are ripping your garment.
03. Pulling The Shredded Threads
After cutting through the stitches to the middle, you can unattach the loose threads and pull them for each interval. These aren’t too difficult as they’re already loosely stitched.
You don’t have to be too fussy here. Just take the stitch out as you come to it. Carefully remove the thread to the start, then the rest of the stitches, and continue with the straight pin to the end of the seam.
04. Finishing Using A Pair Of Scissors Or Razor Blade
The end of the seam might be tougher to deal with. A feeble straight pin isn’t always the easiest thing to deal with. In this case, scissors or a razor blade should be used to carefully cut the stitches out through the center of the seam.
In addition to being well made, it’s important to keep things neat, so you’ll want to remove any stray threads as soon as you start sewing.
Ripping Out A Serged Seam
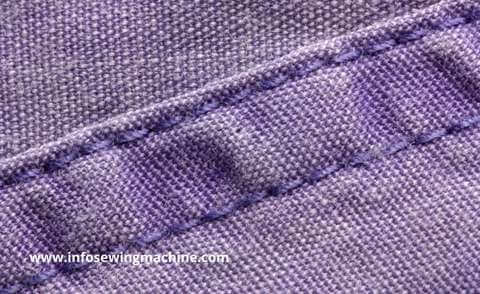
It is easy to remove a serged seam; there are two parts of a seam. one is looped stitching which goes over the edge forming, second is a straight stitch, which goes across the looped stitches. You can start cutting through the straight stitches and pull them out of the fabric.
How Do You Rip Seam Fast?
You are in a hurry and want to remove the seam fast. Here you can do this. Just cut the threads from the start of the seam and the end of the seam using scissors, a blade, or a trimmer. Now pull the straight stitch and finally the looped stitches.
Things To Consider While Removing Embroidery
- A larger blade removes embroidery quickly, but the smaller blade allows more precise control.
- Shaving filled stitches, you must hold the tool on the right side up for best results.
- Clip the bird’s nest with the embroidery scissors first.
- Hold the blade perpendicular to the stitches.
- Remove the outline using a needle.
- Don’t apply extra pressure while using a blade or trimmer because it can touch and damage the fabric’s surface.
- Pull the extra threads with your hands so it will clean the area.
- Repeat cutting and pulling the thread until you clean the whole area.
- Use a lint brush, contact paper, or duct tape to clean up the front and back area of the fabric.
Conclusion | How To Remove Embroidery Without A Seam Ripper
In conclusion, If you’re new to embroidery, it can be a huge pain in the butt to try to remove the embroidery. It can be annoying to deal with stitching, especially when it’s in the wrong place. You’ll often find that you are left with a hole in the fabric, leaving you with no choice but to cut off the unwanted stitching. Thankfully, we have found a great alternative that will help you to remove embroidery without damaging the item.
Read all the methods in the post to learn How To Remove Embroidery Without A Seam Ripper?
FAQs | How To Remove Embroidery Without A Seam Ripper
What’s the best way to remove embroidery without a seam ripper?
The best way to remove embroidery from a garment is to use a seam ripper. However, if you don’t have one, you can use a pair of scissors, blade, trimmer, or needle to remove or pull the thread off the fabric.
How do I remove embroidery without damaging the garment?
Using a seam ripper, you can remove embroidery from your clothing without damaging the garment.
What is a seam ripper?
A seam ripper is a tool that can open up the seam of a garment. It is also used to cut threads, remove embroidery and adjust the fabric under the presser foot.
What is embroidery?
Embroidery is the art of adding decorative stitching to a garment. It can be done in various ways, including satin stitch, blanket stitch, chain stitch, and many others.
What’s the best way to avoid ripping the fabric?
The best way to avoid ripping the fabric is to cut the thread before pulling it.

